Installing Webman Project on Baota Panel
0. Environment Requirements
- PHP >= 8.1
1. Create Project
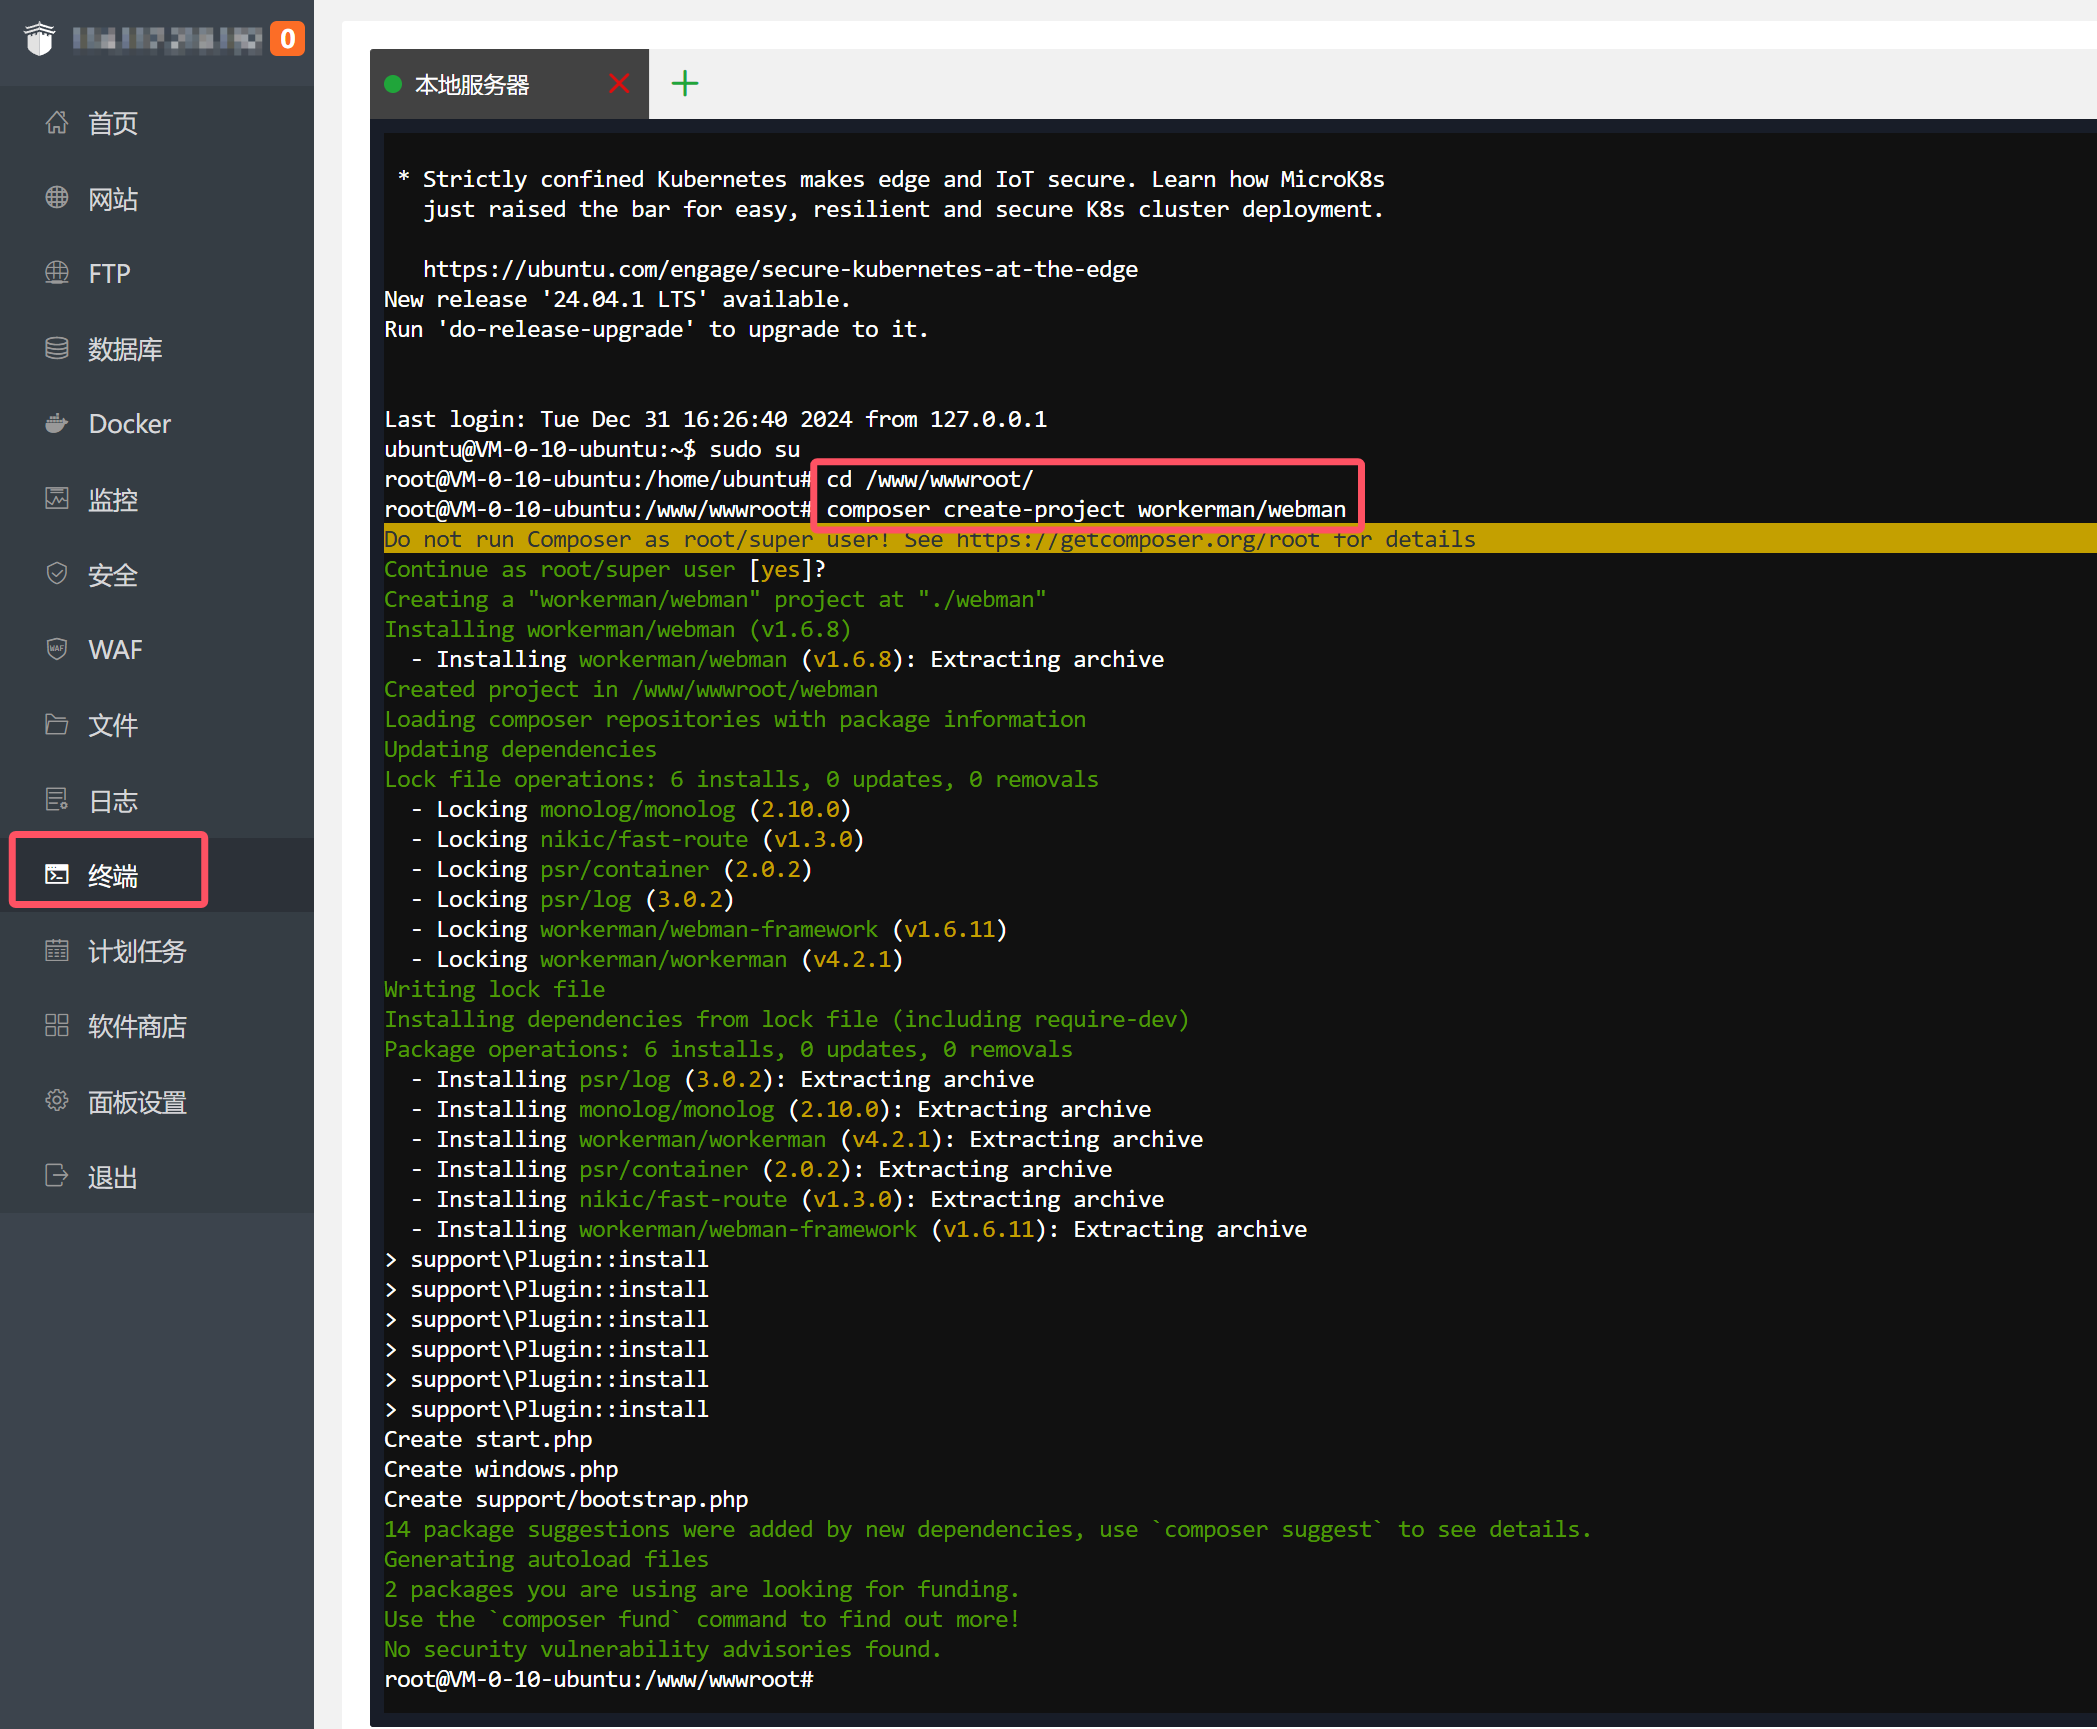
cd /www/wwwroot
composer create-project workerman/webman:~2.0
2. Set Up Website
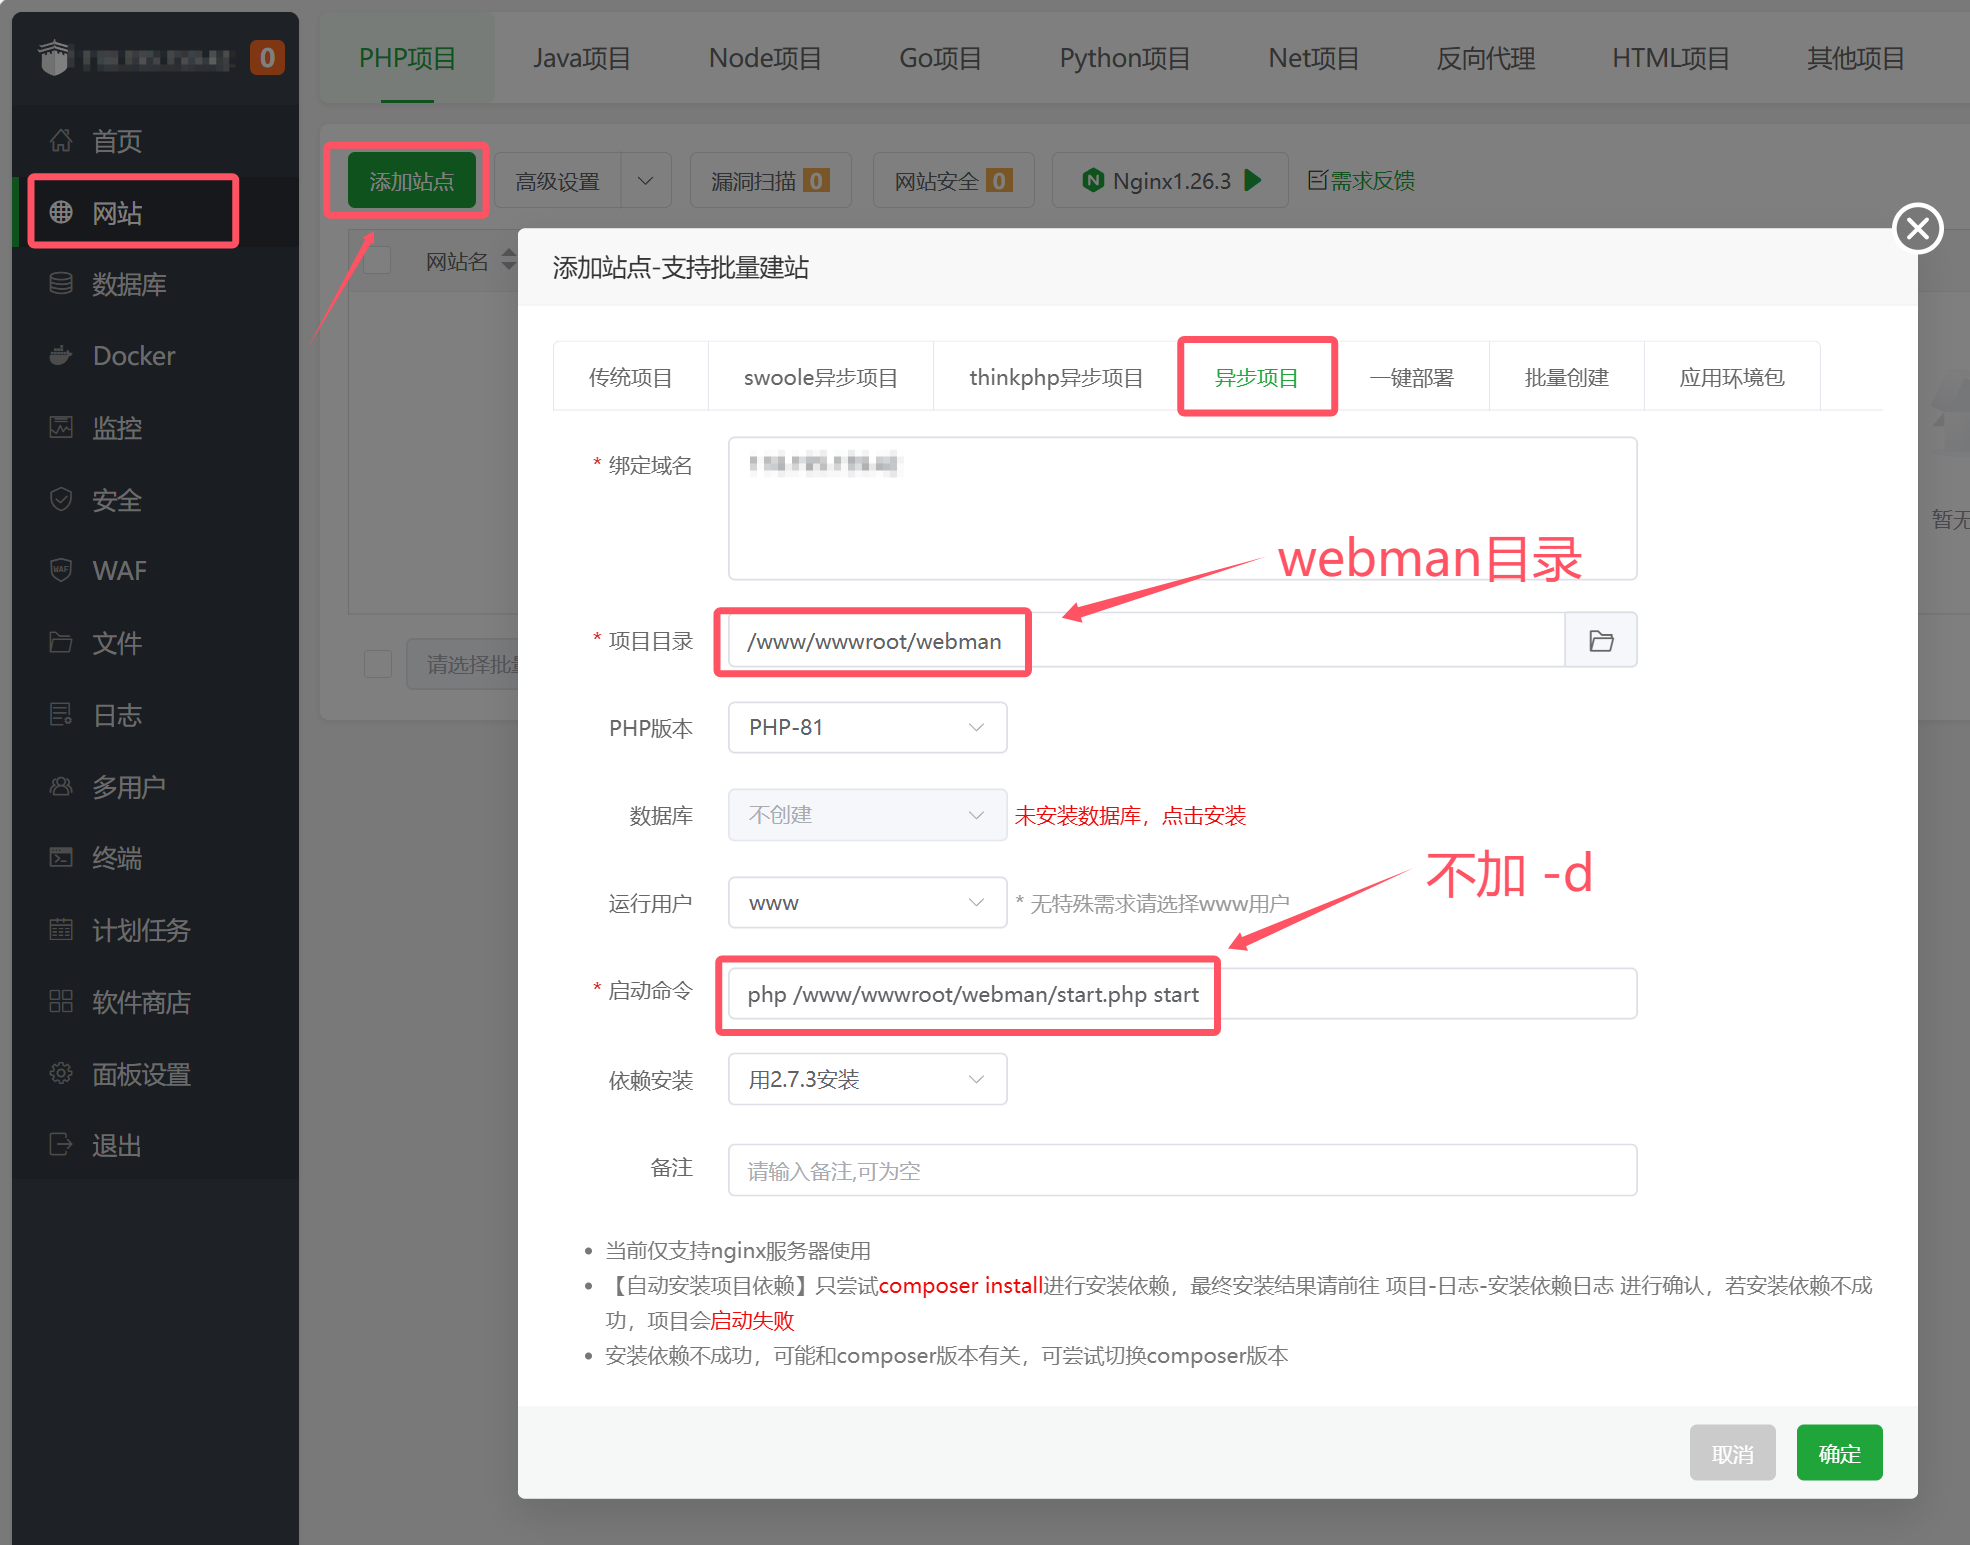
Note:
Baota will automatically daemonize the process, the startup command isphp /www/wwwroot/webman/start.php start, do not add the-dparameter, otherwise it will not start.
3. Configure Site
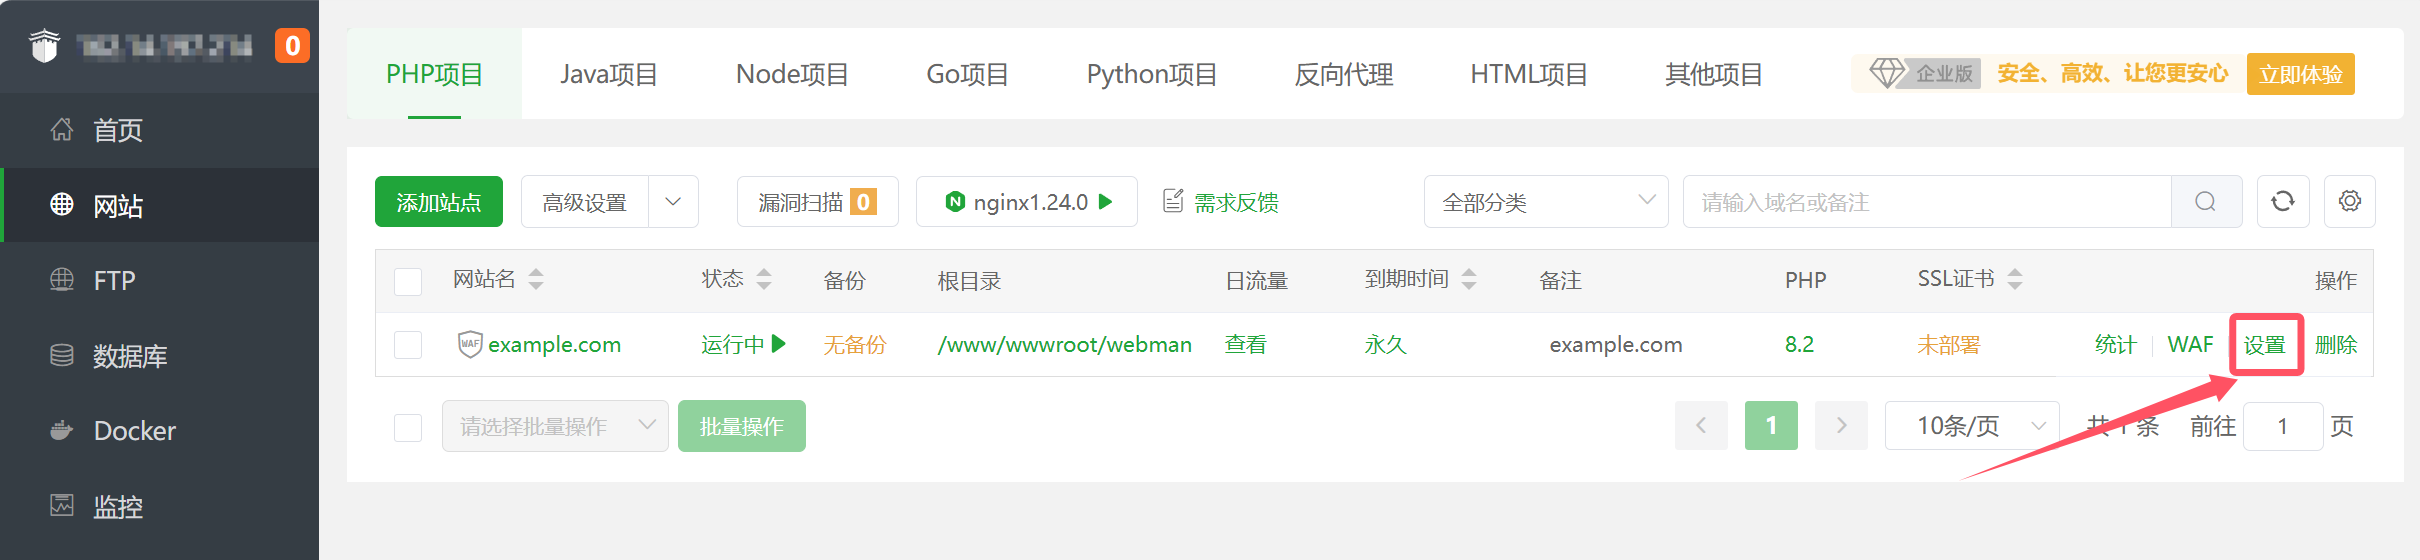
4. Set Running Directory
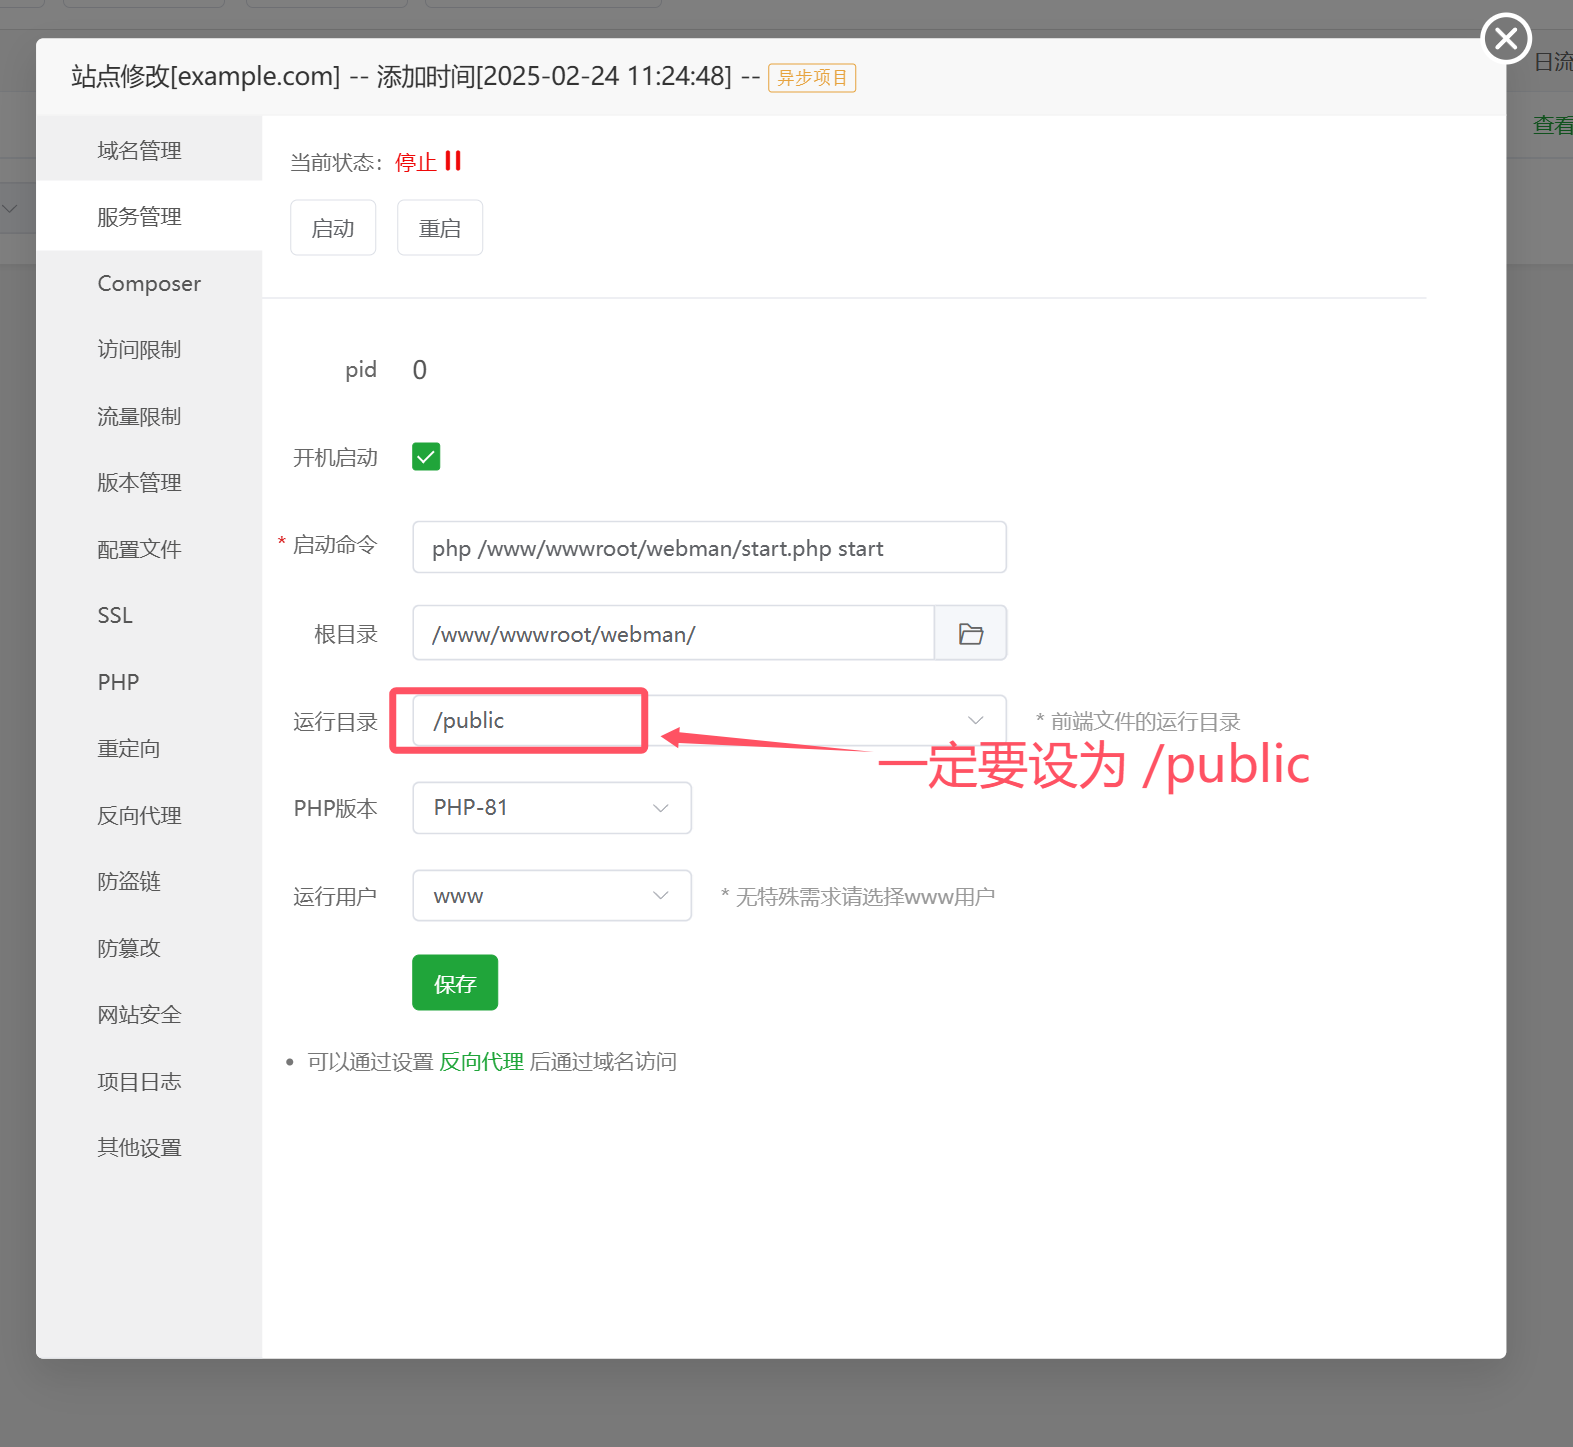
Note:
For system security, the running directory must be set to/public. Incorrect settings may lead to sensitive files being accessible from the external network.
5. Set Up Rewrite Rules
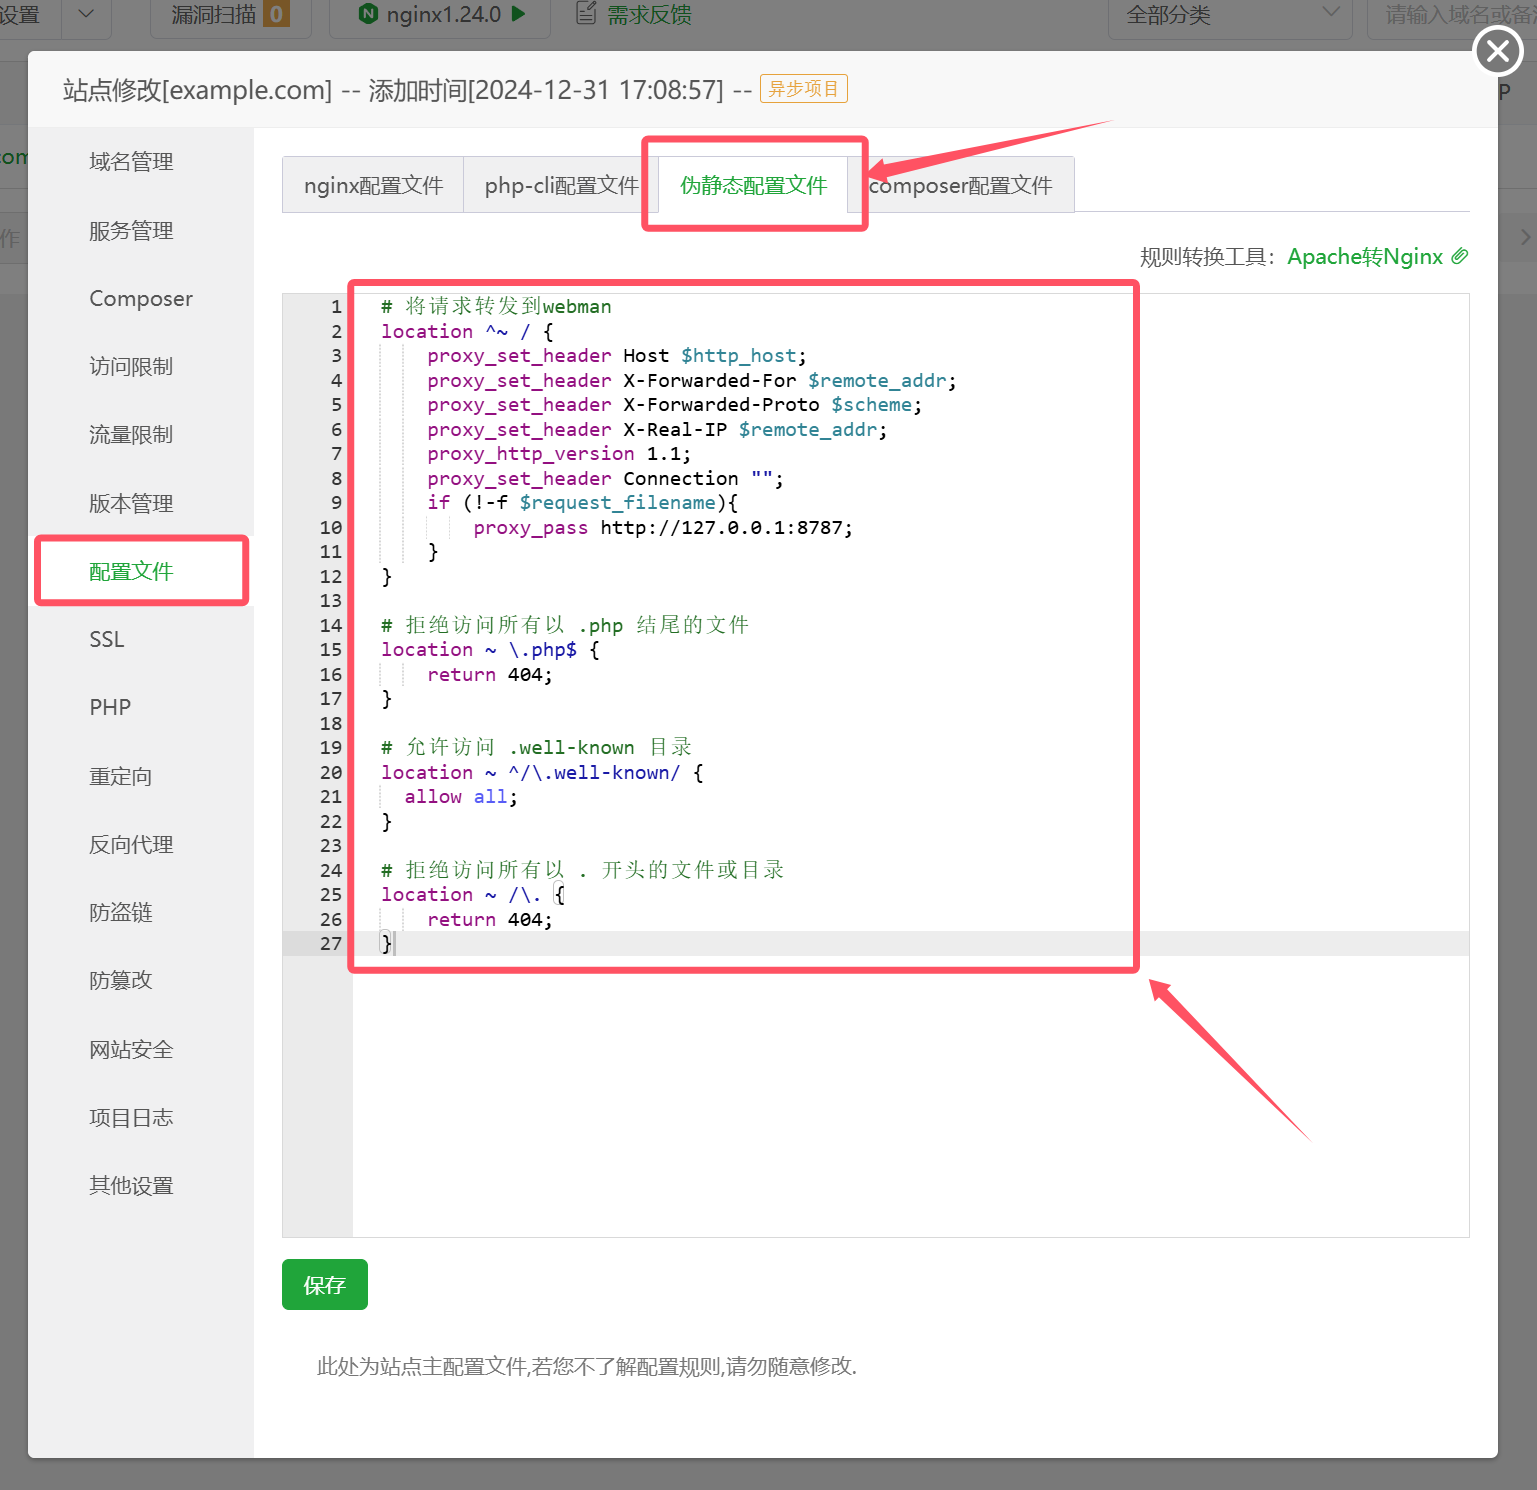
  # Forward requests to webman
  location ^~ / {
      proxy_set_header Host $http_host;
      proxy_set_header X-Forwarded-For $remote_addr;
      proxy_set_header X-Forwarded-Proto $scheme;
      proxy_set_header X-Real-IP $remote_addr;
      proxy_http_version 1.1;
      proxy_set_header Connection "";
      if (!-f $request_filename){
          proxy_pass http://127.0.0.1:8787;
      }
  }

  # Deny access to all files ending with .php
  location ~ \.php$ {
      return 404;
  }

  # Allow access to the .well-known directory
  location ~ ^/\.well-known/ {
    allow all;
  }

  # Deny access to all files or directories starting with .
  location ~ /\. {
      return 404;
  }
6. Set Writable Permissions for Runtime
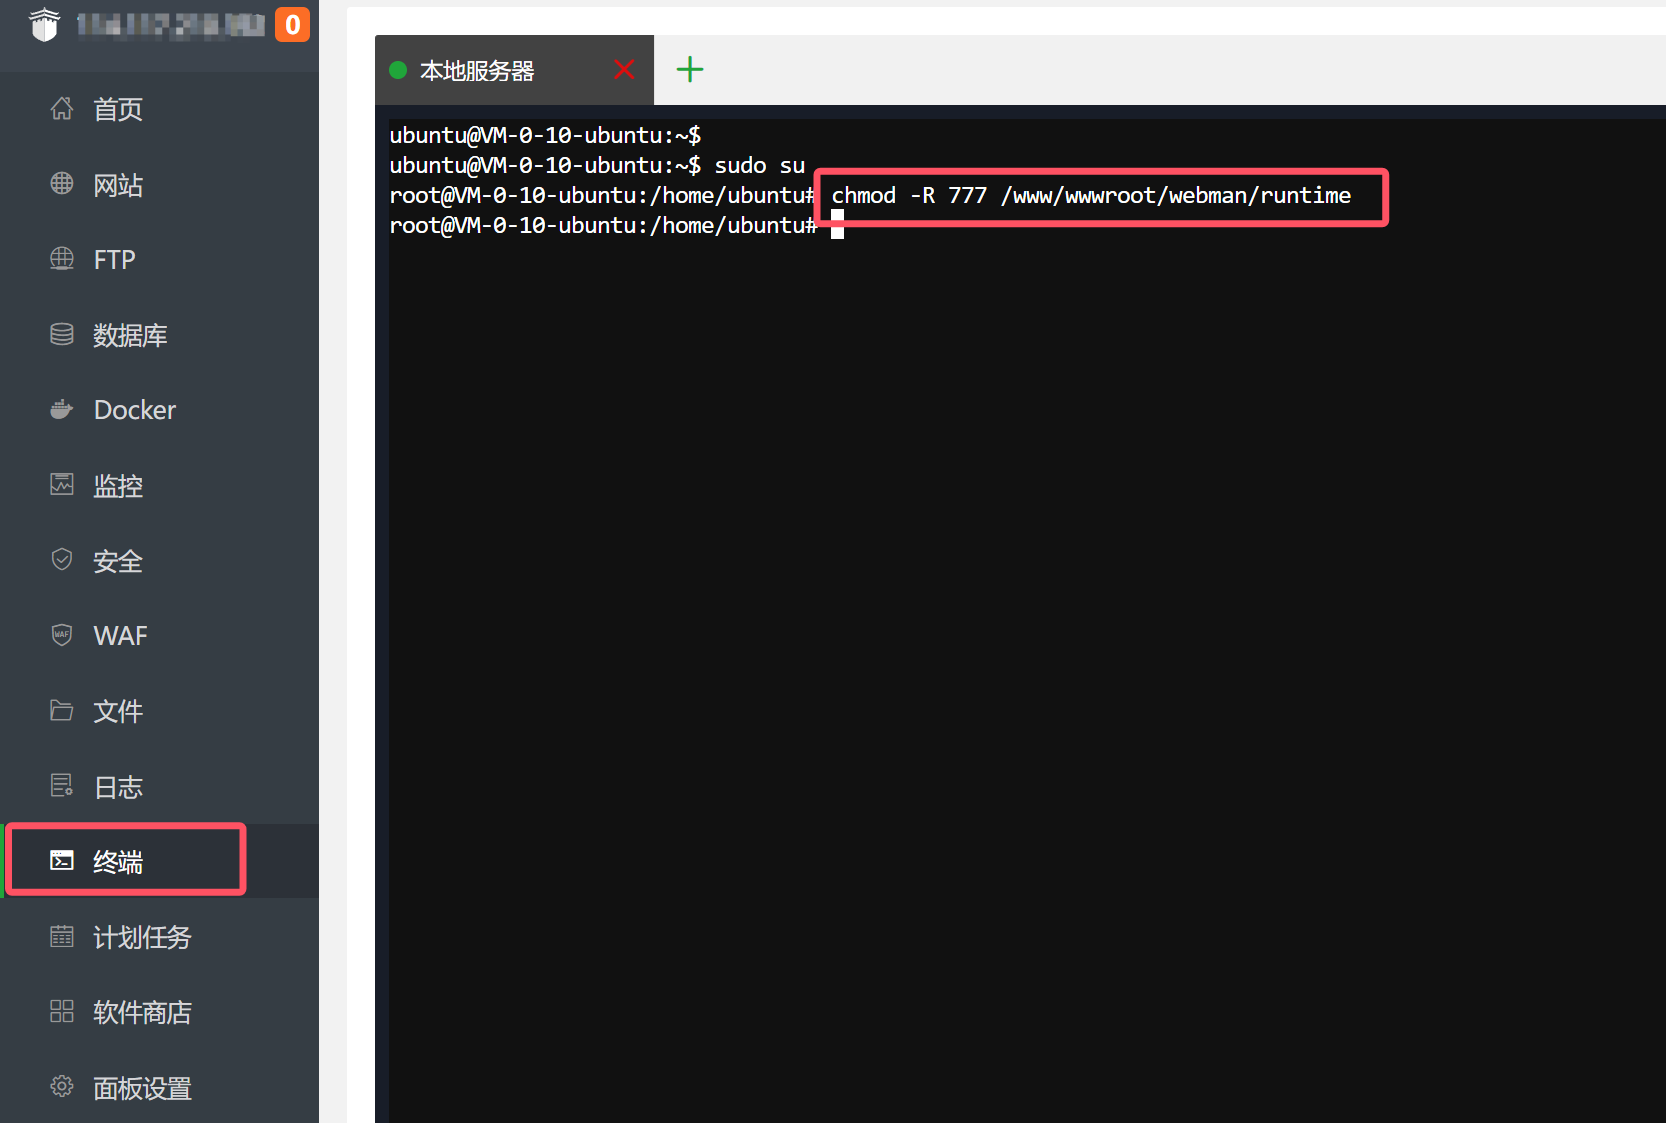
chmod -R 777 /www/wwwroot/webman/runtimeNote:
This step is not usually required. This may be a Baota bug; the service is set to start with thewwwuser, but it actually starts with the daemon user, resulting in inability to write to the runtime directory.
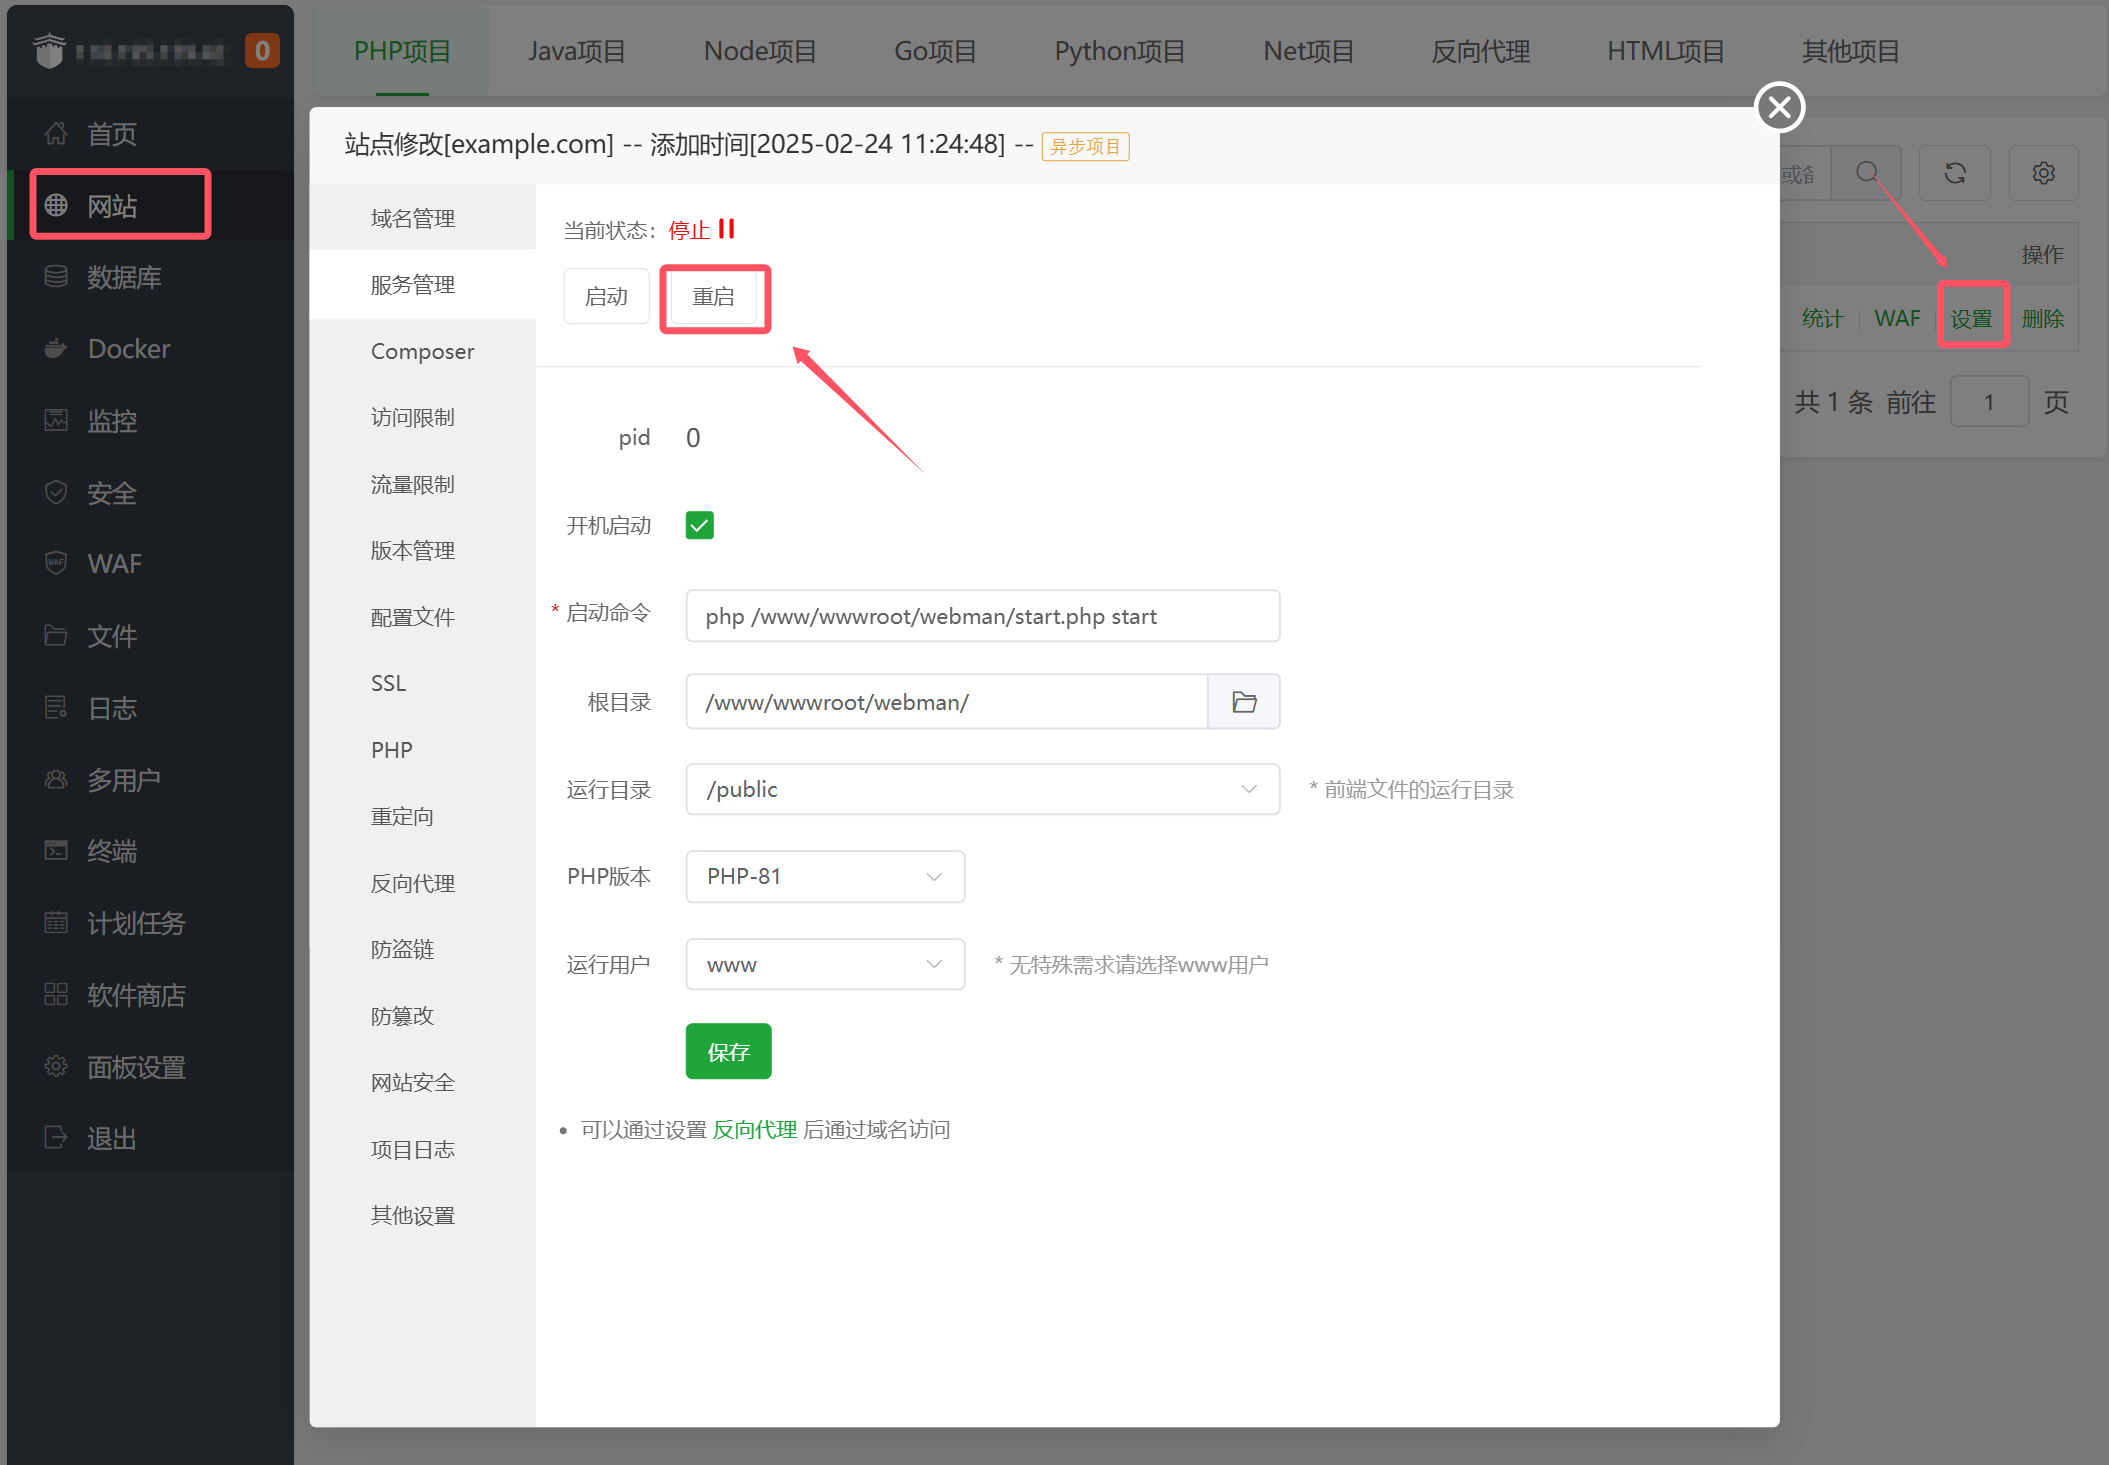
7. Restart Service
8. Access the Site
Visit the site at http://example.com to see the welcome page of Webman.
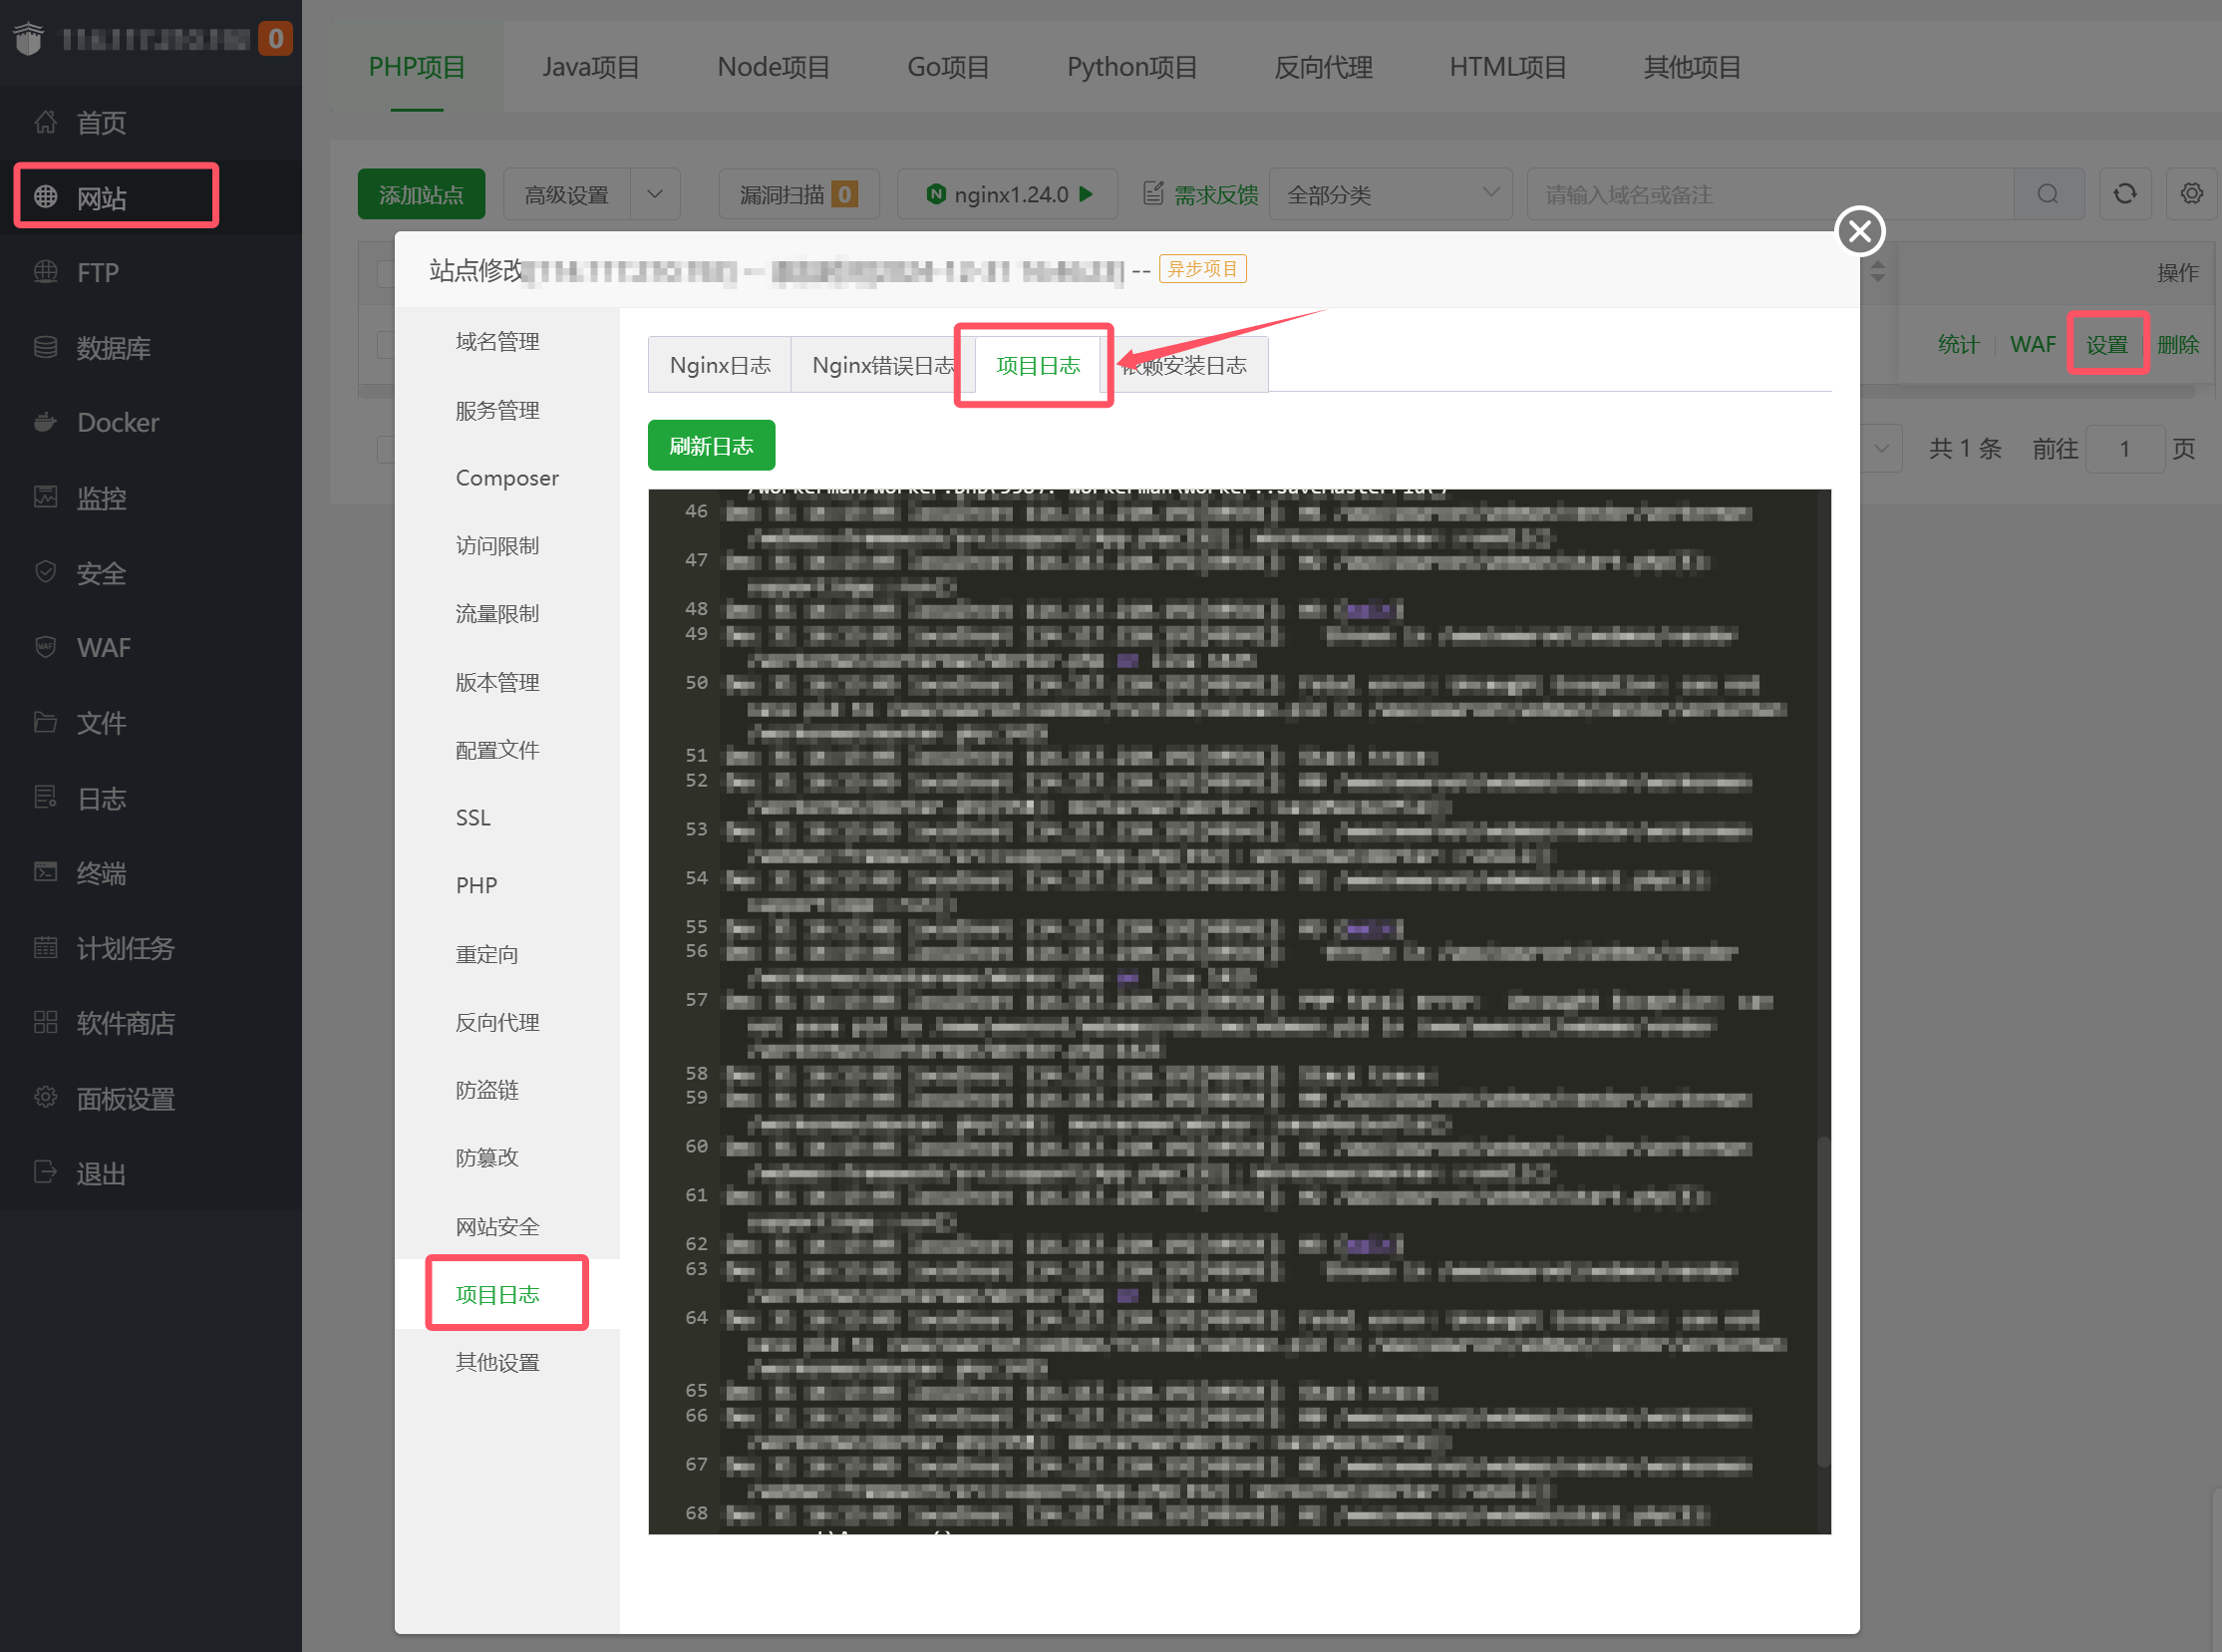
Troubleshooting
-
If the site is inaccessible and shows 502 Bad Gateway
Check if Webman is running. -
If Webman fails to start
As shown in the image, check for error logs.